Latest Posts

Fusion Tuna Gimbap (참치김밥)

“A picnic is more than eating a meal, it is a pleasurable sate of mind.”

-DeeDee Stovel

When I moved to Korea back in May 2012, one of the first foods my brother introduced me to was gimbap. It’s basically a seaweed roll (gim = seaweed, bap = rice) stuffed with tasty ingredients: egg, ham, crab stick, carrot, perilla leaf or spinach, danmuji (yellow pickled radish), and cucumber. Additionally, tuna, bulgogi, or kimchi can be included. You nearly always get a side of danmuji to eat with it. However, danmuji is one of those foods that I hate with a passion, outside of gimbap and bibimbap, so having it as side dish to my gimbap never happens.

However, it works really, really well in gimbap, giving texture and bite to the seaweed roll. My favourite kind is the chamchi or tuna gimbap and I’ve been known to eat two chamchi (tuna) sangak gimbap (triangle gimbap) at a go! These gimbap are in the shape of small triangles and usually are filled only with rice and tuna mayonnaise. You can buy them at all the convenience shops. Gimbap is often served at picnics or on school field trips as it is easy to make and quite filling.

The amazing gimbap that Lucy made me.

The amazing gimbap that Lucy made me.

The last two weeks of January I spent on a staycation during which I spent a lot of time relaxing, cooking, reading, watching Scrubs and doing some travel. Part of the trip was spent with one of my lovely friends, Lucy.  Since I’ve known her she has taken a trans-formative journey to veganism. She has some of the most amazing food photos on Instagram (click here) which always inspire me when I feel like being lazy. While I was with her she made me some vegan gimbap and it got me thinking that the only thing preventing me from making my own gimbap was laziness, and, really, that’s a very silly reason to not make my own.

The following recipe is my own take on  this, one of my favourite quick bites, here in Korea. Although the ingredient list is long, don’t get overwhelmed  – most things you can find in your local grocery store. If you don’t have access to a Korean mart or Asian shop, you can leave out the danmuji (I did the first time I made it!). Also, if you’d like to make traditional gimbap, check out Maangchi’s recipe.
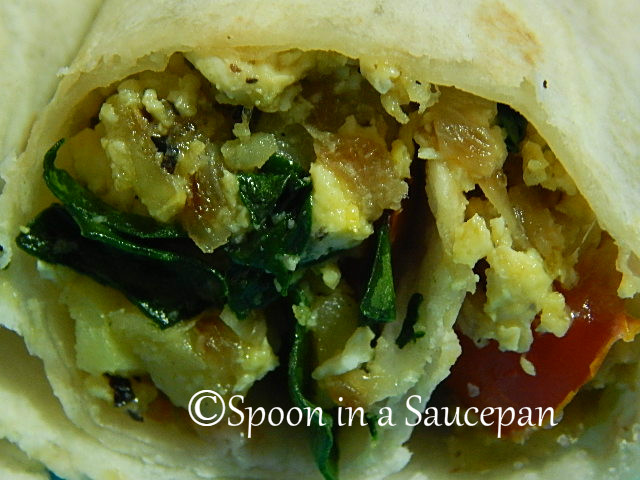
 

gimbap1

Fusion Tuna Gimbap

Makes 3 rolls

Note: Consume within 24 hours

Ingredients

  • 3 large gim/seaweed sheets

Rice

  • 2 cups, freshly cooked Korean short grain/sushi rice
  • 1 tsp sesame oil
  • Salt

Chamchi/Tuna Mix

  • 150g tin of tuna
  • 1 small onion, chopped
  • 1 tbsp mayonnaise (adjust as per your own taste)*
  • 2 tsp whole grain mustard (adjust as per your own taste)
  • Salt
  • Pepper

Avocado Mix

  • 1 avocado, mashed
  • dash of lime juice
  • 1 tsp, dried coriander/cilantro OR  1 tbsp fresh coriander/cilantro, finely chopped

Filling

  • Perilla leaves, two or three per gimbap roll
  • Carrot, sliced into thin strips
  • Bell Pepper, sliced into thin strips
  • Cucumber, sliced into thin strips
  • Danmuji, sliced into thin strips (optional)*
  • Cherry Tomatoes, sliced into thirds (optional)

Topping 

  • Sesame oil
  • Sesame seeds

Method

  1. Place the seaweed flat on to a cutting board and set aside. If you have a bamboo mat you can place it on that instead.
  2. Mix the rice, sesame oil and salt together. Set aside.
  3. Mix the tuna, mayonnaise, mustard, onion and seasonings together. Set aside.
  4. Mash the avocado ingredients together and set aside.
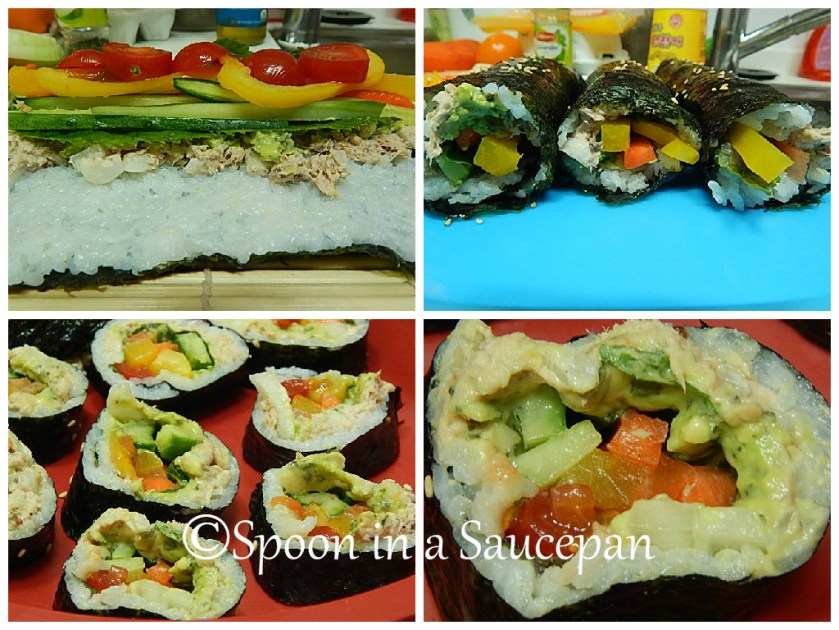
  5. Spread a thin layer of rice over the sheet of gim. You want it to cover most of the gim but leave  an edge of about an inch empty. This edge should be the one furthest from you.
  6. In the middle of the rice, spread some of the tuna mix.
  7. Lightly spoon some avocado on to the tuna, and then top with 2 or three perilla leaves.
  8. Layer a few pieces of each of the remaining ingredients on top of the perilla leaves. Don’t over pack it.
  9. It is now time to roll the gimbap. If you have a bamboo mat you can use that to assist you, but it is not necessary. Lift the side of the gim nearest you and roll it in over the tuna mix. Tighten and continue to roll, tightening as you go, until you have reached the end of the gim.
  10. Tighten once more, and then using a pastry brush, brush on some sesame oil and then sprinkle the sesame leaves on top.
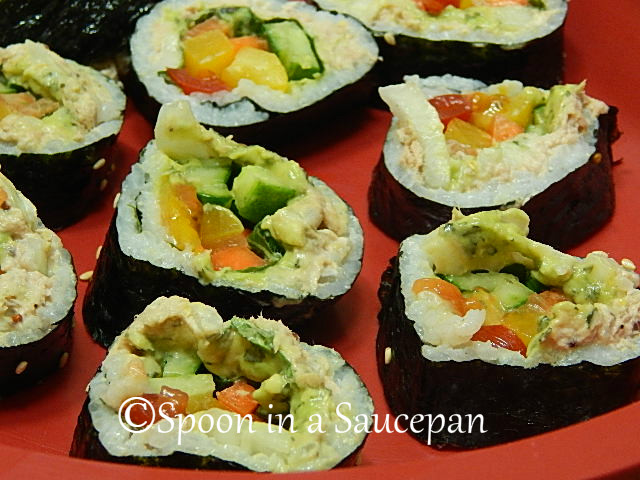
  11. Using a very sharp knife, slice the gimbap into bite-size pieces.
  12. Transfer the gimbap to a serving plate and serve** with some danmuji slices, if you like. You will need a chopstick to eat this with  as forks are a bit impractical. Consider it a chance to practice your skills – I know I do!

*Tuna gimbap is usually really mayonnaise-y, I prefer my mayonnaise to have some “bite”, so i always use mustard as well.

**Additionally, you could serve with Kimchi Vegetable Fries and/or Tuna and Kimchi Fried Rice for a Korean night.

Tips

Leftover vegetables: I bagged any extra vegetables and used them for gimbap the next day. Additionally, you could use them in a stir fry or a salad or as veggie sticks.

Make ahead:  Gimbap is best eaten fresh. However, I made this for lunch twice this week, making the gimbap up the night before. It was still good. However, make the entire gimbap up and not just the rice. The rice will harden in the fridge and it will be difficult to spread it on the gim.

Make it your own:  Instead of using mayonnaise and mustard, stir the avocado into the tuna and onions. I didn’t bother with the egg, ham or imitation crab stick that is usually included. However, feel free to add them. For the egg, refer to Maangchi’s recipe (linked above).  Also, the first time I made it, I didn’t bother with the sesame oil and salt in the rice and it’s still really good.

Sweet Potato, Spinach and Feta Scrambled Eggs

“And now leave me in peace for a bit! I don’t want to answer a string of questions while I am eating. I want to think!”

“Good Heavens!” said Pippin. “At breakfast?”

– JRR Tolkien

After trying the amazing creamy scrambled eggs courtesy of Healthy Recipe Ecstasy, I was excited to try an idea that had been floating around my head since just before Christmas. In fact, I did try this on Christmas day but I knew that I need to work on the creaminess just a little bit. Fresh with my new knowledge, I set out to create scrambled eggs with sweet potato, spinach and feta. Man, I couldn’t get it right. I kept struggling particularly with the sweet potato.

The method that Michelle used in her creamy scrambled eggs is replicated in these ones, so make sure to check out the last post. These scrambled eggs work best when you have a little time, so they are perfect for a lazy weekend or a stay-cation.

sweetpotatowrap

Sweet Potato, Spinach and Feta Scrambled Eggs

Serves 1

Ingredients

  • 1½ tbsp, olive oil
  • ¾ cup, diced sweet potato (I used Goguma, a Korean sweet potato), washed and dried
  • 1 onion, chopped
  • ¹⁄3 cup , roughly chopped spinach, washed thoroughly
  • 2 eggs, whisked
  • garlic salt, pinch
  • ¼ cup, feta cheese
  • freshly ground black pepper

Method

  1. Heat the oil in a large frying pan on medium to medium-high heat.
  2. Once hot, stir in the sweet potatoes and cook for 1-2 minutes.
  3. Add the onions, lower to medium heat and saute, stirring occasionally, until the sweet potato is tender and very lightly browned. Don’t let the onions brown too much. (Around 15 minutes)
  4. Add the spinach and lower the heat slightly, just a little below medium)  and cook for a further 1-2 minutes.
  5. Add the egg and let it just set, around 30 seconds. Add the garlic salt and then, lower the heat to medium-low and start gently pulling the eggs back and forth to the center of the pan.
  6. Once they are almost done but still a little runny, add the feta, and black pepper. Shuffle the eggs back and forth for about another minute and then remove the eggs from the pan. As mentioned here, the eggs will continue cooking when you remove them from the heat. Serve immediately.

Tips

Breakfast ideas: To make it a little more substantial, serve in a wrap with halved cherry tomatoes seasoned with garlic salt. You could also serve on toast with a side of fruit.


Healthy Recipe Ecstasy’s Creamy Scrambled Eggs (Re-blog)

One of my favourite things about cooking is seeking inspiration from everywhere and anywhere. Unfortunately, I rarely get time to cook all the amazing dishes I’ve found. Cooking my own recipes takes up more than enough of my time but some of these finds have been burning a hole in my taste-buds for more than a year, begging me to find the time, and, more typically here in Korea, the ingredients. Luckily, I have the next two weeks off from school and I’ve decided to devote a portion of that time to making some bookmarked recipes.

The following recipe is re-blogged from one of my favourite food bloggers, Michelle, over at Healthy Recipe Ecstasy. Her recipe for Crock Pot Chicken and Lentil Curry was the second thing I ever made in my slow cooker and it’s become a firm favourite of mine. I even introduced my family to it the first time I went home after moving to Korea. Since then, I’ve been browsing her blog on pretty much a daily basis. Her photos and recipes are astounding and I always feel as if I could reach into my computer and eat right from the screen. Consequently, I was delighted when I stumbled across this recipe.

And, now, a confession: I don’t really like creamy scrambled eggs. I prefer mine drier but Michelle, may have just converted me forevermore. Thank you, Michelle, for the introduction and the permission to share this wonderful recipe (I’ve had it about 5 times in the last two weeks, made with spinach in the photo above)!

Comments are disabled for this post.

 ________________________________

(from Healthy Recipe Ecstasy)

I don’t know if I’ve mentioned this before, but I am obsessed with eggs. All kinds, all ways. Poached, fried, scrambled, baked, you name it. I make myself scrambled eggs or an omelette at least four times a week. I even scramble eggs in the microwave at work to get my fix. If you’ve never done it before, microwave scrambled eggs can be delicious but they are a tricky animal. The difference between yummy and rubbery is just a few seconds.

Today, I’d like to dispel a common myth about scrambled eggs. Most people think the only way you can have creamy scrambled eggs is to add milk or cream. UNTRUE. All you need is the right cooking technique and you can have the most amazing creamy scrambled eggs you’ve ever tasted without the added calories and possible stomach upset (I love you cream but my stomach is still holding a grudge…).

INGREDIENTS (makes enough for two people):

4 eggs

2 ounces feta cheese

1 tablespoon chopped fresh basil

1 tablespoon olive oil

A pinch of kosher salt

Freshly-ground black pepper

Continue reading

Minty Hot Chocolate

All you need is love. But a little chocolate now and then doesn’t hurt.

-Charles M. Schulz

Disclaimer: This post was supposed to be published on the week before Christmas, in fact, the original name for this recipe was Christmas Morning Minty Hot Chocolate. However, I didn’t have time to actually try this hot chocolate until Christmas morning.  Consequently, the posting of this recipe was delayed until now:

My 2014 New Year’s resolution was to quit coffee. I had had coffee before coming to Korea but only rarely and usually iced. The very day I arrived in Jochiwon (my current town), I started drinking Maxim Coffee and it was love at first taste. I arrived in Korea the last week of May and spent a delightful week visiting my brother in Gangwondo. On the 1st of June I lugged my huge bag to Jochiwon by train. When I arrived, the co-ordinator from the Office of Education picked me up and brought me to my school. I was so nervous that when she asked me if I was hungry (it was around 12.30pm), I said “No” even though I was starving as I was terrified of having to eat with chopsticks straight away in front of everyone. So they offered me coffee, and not wanting to be churlish I accepted it. Seven coffee shots later I was shaking, exhausted and hooked!

For 1.5 years I drank those sugary delicious coffees (as well as cappuccinos, lattes etc) with the regularity I used to drink tea (and yes, I was still drinking 2 cups of tea everyday!).  However, I was noticing lots of problems – stomach cramps, digestions problems etc and while I knew coffee wouldn’t be the only contributor it was the biggest change I’d made in my lifestyle since coming here, diet wise. So, when the opportunity arose to make a tough change I embraced it. I will admit it was quite hard the first 6 months. For January and February I averaged about one cup a week. By the end of April, I’d managed to say “No” to Maxim at school and to only drink the teas that were available instead. However, I was still having the odd cappuccino or latte.

Since August, I’ve been completely coffee free! Yay! Instead I am back to drinking 2-3 cups of tea a day (Barry’s usually) and I generally choose Hot Chocolate when I am out and about. I usually keep a stack of Hot Chocolate packets close by for whenever the need arises.  Recently, though I’ve been branching out and exploring making my own hot chocolate from scratch. I’ve loved this one from Yeah…immaeatthat and I’ve been experimenting (and mostly failing) with white chocolate.

When Christmas was approaching I spent quite a bit of time thinking about how I wanted to spend Christmas morning. My friend stayed overnight Christmas Eve and I was so excited because it was my first Christmas Eve sleepover in 3 years! We had every little detail planned for the Christmas Eve and Christmas morning – right down to what we would drink and when, which included the following Minty Hot Chocolate which we indulged in before our guests arrived. I made it again on my birthday, it was just that good. And, when I go on my date (with myself) tonight to watch the stars at Sejong Lake this rich, and simple, drink will fill my thermos.

hot choco 2

Minty Hot Chocolate

Serves 4

Ingredients

Hot Chocolate

  • 19 fl oz/ 560 ml coconut cream
  • 1 tbsp coconut butter
  • 1 cup, mint chocolate squares*
  • ¼ cup – 1 cup double/whipping cream**

Toppings

  • ¾ cup double/whipping cream
  • ¼ tsp vanilla
  • 2 tsp sugar
  • 1 Peppermint candy cane, crushed, to decorate (optional)
  • 4 Peppermint candy canes, to decorate (optional)

Method

  1. Place all the hot chocolate ingredients in a pot on medium heat.
  2. Whisk until the chocolate has melted into the cream and everything is hot throughout.
  3. Meanwhile, put the first three topping ingredients in a bowl, whisk until peaks form and set aside.
  4.  Pour the hot chocolate in mugs and pipe the whipped cream on top of the hot chocolate. Decorate with the crushed peppermint and candy canes.  Serve and enjoy.

*I used Andes mints but a broken Aero Mint bar would work as well.

**Depending on how rich you want it, add the desired amount of cream. When  I made it for my birthday I used 500ml of double cream but it was a little too rich. I’d suggest a cup, maximum.

TIPS

Re-heating: This hot chocolate might harden once cooled, so when re-heating, heat gently over medium-low heat until everything melts again and is hot throughout.

Tomato, Bean and Avocado Salad

Black beans and soy beans are the cornerstones of longevity diets around the world.

-Bobby Darin

This last week was the second week of camp for me and it’s been a busy one. Teaching camp is a lot more work than normal day-to-day as I have to prepare a lot more material and put a different “teaching cap” on to make sure the kids have a lot of fun. I know my 3rd graders are having a blast but I’m not so sure about some of the older kids!

Anyway, I’ve had to bring a lot more work home with me so I haven’t had much time to prepare food for dinner and lunches. Luckily, I came up with an amazing little salad that has been a lifesaver this week; it’s healthy, tasty, and best of all, assists with lowering cholesterol and improving digestion. Yay for legumes!

The idea for this salad was thanks to a trip to Costco where I picked up a large jar of oil-packed, oven-dried organic Roma tomatoes and some avocados. I basically threw together whatever I had on hand and came up with something I ate six times in one week.  My favourite part of this salad is that it is a no-dressing salad. The oil from the tomatoes is dressing enough!

salad1

Tomato, Beans, and Avocado Salad

Serves 1-2

Ingredients

  • ¾ cup kidney beans
  • ¾ cup black beans
  • ½ cup oil-packed oven-dried tomatoes/sun-dried tomatoes
  • 10-12 cherry tomatoes, halved
  • ½ avocado, sliced*

Method

  1. Put all the ingredients in a seal-able plastic container and shake.
  2. Refrigerator for a minimum of thirty minutes and then eat. I usually make it the night before and then bring it to work.
  3. Eat by itself, serve with bread, corn tortilla chips, or toss with pasta. You could also wrap in lettuce leaves.

*Use an avocado that is on the firm side. If you don’t have one, add the avocado just before eating.

TIPS

Make it your own: This recipe is easily doubled or reduced depending on your needs. Additionally, add some fresh coriander/cilantro or garlic if you want. I really wanted to add some coriander but sadly the Asia Mart in my town was out.