Latest Posts

Cheese-y Tuna Burgers Three Ways: Mustard, Pesto, and Sweet Chili Sauce

“Is this chicken, what I have, or is this fish? I know it’s tuna, but it says ‘Chicken of the Sea.'”

– Jessica Simpson

Does  anyone else remember the hilariously bad things Jessica Simpson used to say in the early 2000s? Every time I think of tuna that quote comes into my head and I get a little giggle. And I think of tuna a lot as it’s my favourite fish along with mackerel. I love adding tuna to salads, sandwiches, and finding new and exciting ways of using it. So, I’m a wee bit ashamed to say that Jessica Simpson tends to pop into my head a lot more often than I’d really like!

Growing up in my family, Friday’s were always meat-free days, so my parents would get out the big heavy chip pan and make homemade chips (french fries) on the hob. Dad’s chips were always of a thicker cut, golden and fluffy. Mam’s chips were always a bit thinner, darker and, if you were lucky, crispy the whole way through. We’d slather butter on some bread, loading each slice up with chips, some red sauce (ketchup) and, if you liked it, mayonnaise.  

Sometimes though, Mam would change it up and instead of chip sandwiches we’d eat tuna burgers with chips on the side. Luckily, the tuna burgers were sublime, so we never felt we were losing out on those Friday night chip sandwiches. I’ve often burned my tongue on this piping-hot sandwich but it has always been worth it to bite into the gooey melted cheese combined with the tantalising mixture of briny tuna and tangy onion.. Traditionally, I’ve always had mayonnaise and mustard (divine!) as the dressing in the tuna mixture but a lucky accident led me to substituting pesto for the mustard. The pesto, I think, really brings out the flavours of this dish and adds a little pizzazz to this homely meal. Another option, is of course, sweet chili sauce. The sauce brings a subtle spiciness to the tuna mix and works really well with cheddar.

I’ve never heard of anyone else having these besides our family, although in college we used to get Tuna Melts on bread rather than buns. However, I always preferred Tuna Burgers (maybe it’s the bun?) and, for me, it is one of my go-to recipes where I nearly always have the ingredients on hand.

Living in Korea, getting decent burger buns is hard, but thanks to some mini buns in Paris Baguette, I’ve been making my own version of my Mam’s classic Friday night dinner for years. These buns work well in a pinch but recently a friend recommended a different bakery where they have regular sized buns. Delighted with this find, my dinner yesterday (and today’s breakfast) was Tuna Burgers. The recipe below calls for regular sized burger buns but if you want to use mini-buns, use two buns per person.

Cheesey Tuna Burgers Three Ways: Mustard, Pest, and Sweet Chili Sauce

Makes around 8 regular sized burgers.

Ingredients

  • 8 burger buns*
  • butter
  • 1 tin tuna in oil, 210g, drained and patted dry with paper towel.
  • 1 small-medium onion, diced finely
  • around ¼cup dill, sweet, or bread and butter pickles, diced finely (optional)
  • 1 stick celery, diced finely (optional)
  • 1 yellow pepper, diced finely
  •  ½ cup grated cheddar cheese (optional)
  • salt and pepper, to taste
  • 2 tbsp mayonnaise**
  • dressing of your choice**
    • 1-2 tbsp Dijon wholegrain mustard
    • 2-3 tbsp pesto
    • 1-3 tbsp sweet chili sauce
  • 8 cherry tomatoes, sliced in fourths
  • Cheddar cheese, cut into slices to cover both halves of each bun

Method

  1. Pre-heat the oven to around 190 °C.
  2. Slice the burgers buns in half horizontally and butter evenly.  The butter is essential to making sure the buns don’t get soggy. Top the bottom halves with cheese and then place them on some tin foil. Set aside.
  3. Meanwhile, combine the tuna, onion, pepper, celery, pickles, salt, pepper and grated cheese, if using, in a big bowl. Add the mayonnaise and dressing of your choice and mix thoroughly.
  4. Once combined, divide the mixture evenly on top of the bottom halves of the buns.
  5. Add the sliced cherry tomatoes to top of the tuna and another slice of cheese.
  6. Squish the top half of the bun onto each tuna burger.
  7. Wrap in the foil and place in the oven for around 25-30 minutes until thoroughly heated. Serve immediately.

*Depending on the size of your burger buns you may need less or more of this mixture. I’d recommend the burger bun be the size of a McDonald’s dollar menu size burger.

**The amounts for the mayonnaise and other dressings are merely guidelines; adjust as per your personal tastes.

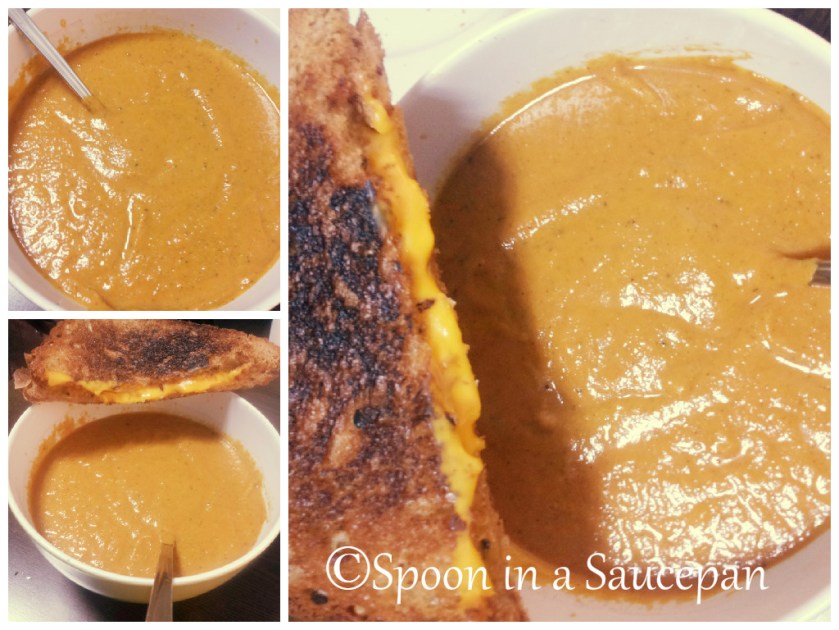
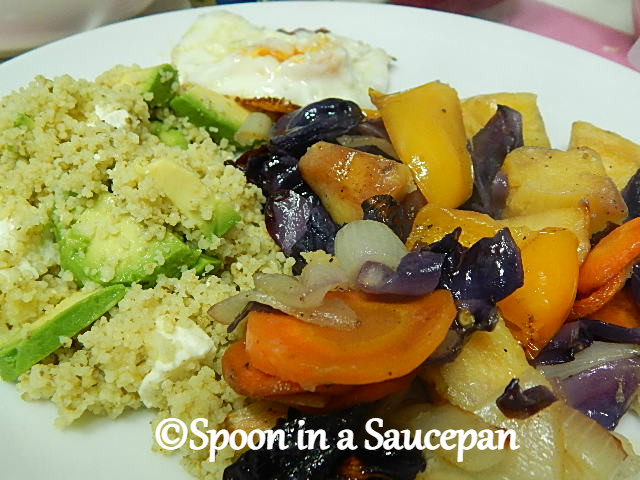
Serve with a salad and/or Kale Baked Beans and/or chips/french fries. Alternatively, you could serve with Kimchi Fried Vegetables instead of regular chips.

Tips

Make it your own:  Substitute scallions/spring onions or red onion for the yellow onion. Don’t like one of the ingredients? Leave it out. You could also add in black olives or sun-dried tomatoes. Additionally, Gouda and Emmental are great substitutes for cheddar. You can also leave out the mayonnaise altogether for a healthier version.

For a larger crowd: When I’ve made these for a larger crowd, I tend to have them as an accompaniment in a pot luck, or as a starter. I use mini-burger buns. This recipe is easily doubled/tripled so if you want to have it as a main, it’s entirely feasible.

Traditional Irish Dish with a Twist: Shepherd’s Pie

“Some foods are so comforting, so nourishing of body and soul, that to eat them is to be home again after a long journey. To eat such a meal is to remember that, though the world is full of knives and storms, the body is built for kindness. The angels, who know no hunger, have never been as satisfied.”

– Eli Brown

With St Patrick’s Day, also known as Paddy’s Day, (the Irish word for Patrick is Padraig which is shortened to Paddy) but never Patty’s Day (Patty is short for Patricia), around the corner, here is my twist on an Irish/British Classic: Shepherd’s Pie.

Shepherd’s pie is one of my all time favourite comfort foods along with the Creamy Tomato Chicken Pasta Bake I shared a while back. It’s filling, tasty and a nice make ahead meal. I always loved when I’d come home from school or work and realise that the amazing smell that was wafting all through the house was Shepherd’s Pie. However, I firmly believe my Mam NEVER made enough as I think it was a rare day if we had leftovers. And, even if we did, they’d still be gone before the night was out. Although, Shepherd’s Pie (also known as Cottage Pie) would make you think that the main meat ingredient was lamb; in fact it wasn’t always the case. Instead, the same name was used interchangeably whether it was lamb or beef. It’s only in more recent years that Shepherd’s Pie has been relegated for the dish made with lamb and Cottage Pie for the version with beef (source: wikipedia).

My version is always made with minced/ground beef and, in any case, this is just one version of Shepherd’s Pie – one that was made on a one-ring stove and in a teensy tiny toaster oven. It’s gotten the stamp of approval from my friends, including one who is Irish-British. When I made it for my friends during my two week vacation, I also threw in some slow cooked balsamic carmalised onions and it really deepened the dish. I had leftovers, so I included the carmalised onions in the recipe below. However, you can leave them out if you don’t have any.

Also, here are some other recipes to get you inspired to turn “Green for a day”

Maggie’s Shepherd’s Pie

Serves 6

(this fills three 200x150x35mm oven proof dishes)

Ingredients

Potatoes

  • 10 medium potatoes, peeled, washed and chopped
  • splash of milk
  • knob of butter
  • salt
  • freshly ground black pepper

Meat Mixture

  • 2 tbsp olive oil
  • 1 cup kohlrabi, peeled, washed and finely diced
  • 1 tsp dried parsley
  • 1 tsp dried sage
  • pinch of chili flakes
  • salt and pepper for seasoning
  • 1 carrot, peeled, washed and finely diced
  • 1-2 onions, finely diced*
  • 1 small sweet potato, peeled, washed and  finely diced
  • 1 cup celery, finely diced (optional)
  • 500g minced beef
  • 1-2 garlic cloves, minced
  • 1 cup button mushrooms (optional), diced
  • 2 cup cooked peas
  • 1.5 cup cooked green beans
  • 1 cup balsamic carmalised onions (optional)
  • salt and pepper for seasoning

Gravy

  • 3 tbsp butter
  • 3 tbsp flour
  • ¼ tsp dried parsley
  • ¼ tsp dried sage
  • 1 beef bouillon cube
  • 1 cup boiling water

Topping

  • Cheddar cheese, sliced thinly

Method

  1. Preheat an oven to 190°C
  2. Meanwhile, place the potatoes in a large pot, cover with cold water and place on high heat.
  3. Bring to the boil and continue boiling until tender.
  4. Drain and mash (with a fork or potato masher) with the remaining ingredients of milk, butter, salt and pepper. You can use as much as you like – I generally use around a tbsp of milk and the same of butter, but I adjust according to taste and texture. Cover and set aside.
  5. Meanwhile, heat a large frying pan over medium-high heat. Once hot, add the oil.
  6. Once the oil is hot, add the kohlrabi, herbs, chili flakes as well as some salt and pepper. Saute for around 5 minutes, stirring occasionally.
  7. Add the carrots, onions and celery, if using. Saute for another 5 minutes, stirring occasionally.
  8. Add the minced beef and garlic continuing to cook until the meat is mostly browned, stirring occasionally.
  9. Add the mushrooms, if using, peas and beans. Continue to cook, stirring occasionally, until the meat is completely browned and all the vegetables are tender.
  10. Meanwhile, boil some water and mix with the bouillon cube. Set aside.
  11. Place a small saucepan over medium heat with the butter. Melt the butter.
  12. Once melted, add the flour and herbs and cook for around 5 minutes.
  13. Add the beef stock and continue to stir until a gravy is formed. If you want a thinner gravy, add more water.
  14. Add the gravy to the meat mixture and let cook for a few minutes to absorb all the flavours.
  15. Put the meat mixture into an oven proof dish, top with potatoes, and then slices of cheddar cheese.
  16. Pop in the oven for around 25-30 minutes until the cheese is melted and lightly browned. If you want you can leave it in a little longer to brown the cheese further.

I would suggest using a normal sized casserole dish to make this – I do all my oven cooking in Korea in a toaster oven so adjustments have to be made! I prefer a slightly thicker layer of potato than I am typically able to get into my oven – hence it being spread out over three dishes!

*If you want to stretch the dish, add a second onion. Otherwise one is sufficient.

TIPS

Make ahead: You can make the entire meal or either the meat base or the potatoes ahead of time. However, using cold potatoes will lengthen the time in the oven – up to around 45 or so minutes.

Make it your own: Shepherd’s pie is a very forgiving dish, so if you leftover vegetables do add some like corn (my mam does this and it’s amazing), turnip/swede, parsnip all work well as do lentils.

Serving Suggestion;  Serve with a side of baked beans or as suggested by, The Rebel Kitchen in her post Comforting Baked Bean Shepherd’s Pie, add the baked beans to the pie itself. I have tried this and it’s great.

Guest Post – Roasted Creamy Tomato Soup

This recipe was provided by one of my best friends here in Korea and who keeps me on my toes by editing my spelling, run-on sentences etc! I’m hoping next time she shares one of her absolutely amazing desserts! Thank you, Becky, for being an amazing friend, editor and, most of all, sharing this recipe and feeding me! It was delicious.  – Maggie @ Spoon in a Saucepan

I am honored to be a guest blogger on Spoon in a Saucepan. – Becky

If one thing is for sure, I wouldn’t consider myself a cook. A baker, yes (I can whip up some mean cakes and cookies), but not a cook. I often listen with envy as Maggie and other friends describe a delicious and simple meal they have just whipped up with ingredients they had on hand, and “Oh it was super healthy too,” they say. To me, simple means spaghetti with sauce out of a jar, and when I look at the carrot, onion, and green pepper in my fridge I see a carrot, an onion, and a green pepper; NOT a delicious salad or quiche that another person would think to “throw together” (as good cooks say). I always jump at the chance to try anything Maggie offers me from her kitchen because I know 1. It has been made with very capable hands and 2. It will most definitely be delicious. However, I am learning through the help of friends, experimenting, and reading helpful cooking blogs like this one to become a better cook. So, when I somehow created this creamy comforting soup and invited Maggie over to try it, I was on the edge of my seat to see how she liked it, and she did! In fact, she liked it enough to invite me to write a guest post on her blog, and I am honored to share the below recipe with you,

When I created this recipe I was craving some good hearty tomato soup with grilled cheese. I wanted to go back to the Campbell’s tomato-soup-in-a-can days when the weather was cold and a warm soup settling in your belly was just the thing to warm you all the way to your toes. Since Campbell’s canned soup is a rarity one would be lucky to find anywhere but Seoul here in Korea, I decided I would try my hand at making my own. This recipe was a combination of two tomato soup recipes I found here and here  with some of my own additions. I love the taste of roasted tomatoes and also wanted a thick hearty soup that wouldn’t leave me hungry right before bedtime. I didn’t peel the tomato skins, but just blended everything right in there. The thicker the soup, the better.

Roasted Creamy Tomato Soup

adapted from Chow and Food Network

Serves: 4

Ingredients:

  • 7-8 tomatoes, halved
  • 8 cloves garlic, divided 4 and 4
  • olive oil
  • salt and pepper
  • 1 yellow onion, diced
  • 1 carrot, thinly chopped
  • 1/4 tsp. red pepper flakes
  • 2 tsp. dried basil
  • 1 cup soy milk
  • 1 cup chicken stock (vegetable for vegetarians and vegans)

Method

  1. Preheat your oven to 200°C.
  2. Lay the tomatoes cut-side up on a baking tray along with 4 garlic cloves
  3. Drizzle tomatoes and garlic with olive oil then sprinkle with salt and pepper
  4. Bake for 1 hour (or 10 minutes longer to really get the roasted flavor) at 200°C
  5. Meanwhile heat a pan on medium-high heat, and add 1 tbsp. olive oil
  6. When the oil is hot, add the onion and carrot and saute until the carrots are softening (about 10 minutes depending on how thinly you cut the carrots—the smaller the size, the faster the carrots will soften).
  7. When carrots have softened a bit, mince the other 4 garlic cloves and add to the mix. Saute for about 3-4 more minutes.
  8. Next add the chili flakes, basil, and soy milk. Allow soy milk to boil, then lower heat and simmer for about 5 more minutes.
  9. Next add the chicken stock and keep heat on low so it’s hot when the tomatoes are finished baking.
  10. When the tomatoes are done, combine the tomatoes and garlic with the carrot mixture and blend until smooth.
  11. Mix once more for uniformity and re-heat again if you desire.
  12. Serve with grilled cheese or toasted bread.

Tips:

Make it your own:  Change the soy milk to cream or almond milk. This will change the flavor quite a bit so experiment with what you like. You can also try it without the carrot and adjust the amount of garlic per taste preference.

A Thinner Soup: For a thinner soup blend the tomatoes separately and strain the juice with a wire strainer. You can also leave out the carrot and substitute stock for the soy milk.

Small Blender: Blend in batches and mix thoroughly before serving.

Vacation

Hi all,

I was on vacation from the 16th Feb until today. However, I managed to get food poisoning and develop a hyperactive gut whilst in Laos. At the moment, I am on a restricted diet of relatively bland food. To that end, I won’t be posting a new recipe for a week or so until I get my appetite back and my stomach has calmed down considerably. However, I will be sharing a guest post at some point in the next week.

Until then, have a good one and happy cooking.

Maggie @Spoon in a Saucepan.

Roasted Vegetables with Pesto Couscous and Fried Eggs

“This is every cook’s opinion –
no savory dish without an onion,
but lest your kissing should be spoiled
your onions must be fully boiled.”
Jonathan Swift

followed-blog-50-1xFirst off…thank you so much to everyone who follows this blog or likes any of the posts. On Wednesday I reached 51 follows! So, thank you, thank you, thank you from the bottom of my heart! Also, a huge shout out to the 178 followers on FB – ye rock, too!  Now, on to this week’s recipe:


Generally, the week before I go on vacation I don’t really eat at home. Instead, I will get fried chicken, gimbap, or a sandwich from Paris Baguette. I always figured it made life easier. Well, I go on vacation on Monday for around 10 days and I decided that I would challenge myself to not be lazy and to try to eat in for most of the time during this week. The weekend is a mix of birthdays and farewells so I knew getting time to eat in would be tricky and I also don’t want to have food I need to throw away.  I’m happy to report that eating (mostly) at home was really rewarding AND I actually got a lot more done than just packing!

One of my goals for 2015 is to waste less food.  This is sometimes hard in Korea as nearly everything is bought in bulk. Buying a single carrot is looked at with askance which means sometimes whatever you buy will spoil before you get to the end of the bag. I also wanted whatever I made to be simple, with minimal amount of dishes to clean up and some leftovers for the next day’s lunch. With this in mind, I looked around my kitchen and threw together some vegetables I had on hand. I was a bit hesitant about sharing this recipe, but I love simple food that I don’t need to put much thought into. It’s even better if I can throw it in the oven and only have to check it a few times to turn and make sure it doesn’t burn (all the better for packing!).

This meal was so scrumptious I ate the same thing for four days! It’s healthy, colourful, and left me craving more. I actually had made enough for my dinner and lunch but, um, I ate most of it in one go. The goguma (sweet potato) and red cabbage brought a lovely sweetness to the dish that goes really well with the rest of the ingredients, especially the onions. Paired with a fried egg and some couscous, it’s a simple but, in my opinion, perfect marriage of healthy and hearthy.

Roasted Vegetables with Pesto Couscous and Fried Eggs

Serves: 2

Ingredients:

Roasted Vegetables

  • 2 small sweet potatoes (goguma/, cut into chunks
  • 2 medium onions, roughly chopped
  • 1 large carrot, sliced into thin rounds
  • 1 bell pepper (yellow or orange), chopped
  • 1½ cups red cabbage, chopped
  • 2-4 whole garlic cloves, peeled or unpeeled (optional)*
  • 3-4 button mushrooms, quartered (optional)
  • 2.5 tbsp olive oil
  • salt and pepper for seasoning

Couscous

  • ½  cup couscous
  • ½ cup boiling water
  • olive oil, for drizzling
  • 2-3 tsp green pesto
  • ¼-½ cup feta cheese
  • 1 avocado, chopped

Fried Egg

  • 2 eggs
  • 2 tsp olive oil

Method

  1. Preheat your oven to 190°C.
  2. Put everything from the sweet potato to the mushrooms into your roasting tin.
  3. Mix in the oil until all the vegetables are well coated.
  4. Add some seasoning, pop it in the oven for around 50 minutes.  Check every 15 minutes and turn the vegetables as needed. Once the carrots are tender and everything is lightly browned, it’s ready.
  5. In the meantime, around 15 minutes before the vegetables are ready, boil a kettle of water.
  6. Put the couscous in a heatproof bowl. Drizzle around some olive oil into the couscous just before adding the boiling water.
  7. Cover the couscous and set aside to swell, around 10 minutes. Once ready, fluff with a fork, mix in the pesto and add the feta and avocado.
  8. Around 10 minutes before the vegetables will be ready, set a frying pan on the stove over medium heat. Once hot, add the  olive oil and heat for around 15-20 seconds. Add the eggs and fry. (I like mine over easy, but you can fry as you like.)
  9. Serve with the couscous and vegetables.

*I like to add unpeeled garlic cloves when I am roasting vegetables as I love the taste of roasted garlic, but I’ve found in Korea a lot of times under the garlic skin the garlic tends to be bad. So I peel them here, but you should try it with unpeeled garlic.

Tips

Make it your own: If bringing for lunch, why not leave out the fried egg or substitute an egg muffin?

Vegan option: Leave out the egg and feta, and substitute a vegan pesto.

Reducing dishes: Use a plate to cover the heatproof bowl for the couscous. That plate can then be used for your dinner. If you are eating with someone, the heatproof bowl can be their dish.

For better roasting: After washing the vegetables, pat them dry in a clean tea towel. Then transfer them to your roasting dish and add the oil.