Latest Posts

Kale Baked Beans

Beans, beans, they’re good for your heart

                                                             -Schoolyard chant

So, I’ve mentioned before how I love baked beans on toast. Everytime I have them, whether they are jazzed up on some fantastic bread or just a tin of Batchelors on Brennans‘, they evoke memories of staying with my Granny during World Cup 1990 while my mom was away. At night when my dad got home, we’d drink really sweet, milky tea and feast on beans on toast. Maybe we didn’t have them everyday, but I was under 8 years old at the time, and that’s what my memory is telling me!

While the bread is certainly important, for example, a nice Vienna Roll or Brennan’s Batch loaf would do the trick, getting such high quality bread in Korea sadly doesn’t equate to a quick and easy meal. I’d have to trek to Daejeon, which is 30 minutes away by train, nevermind actually getting to the bakery and home again. So, I mostly make do with bread from Paris Baguette or Homeplus, which would make any true bread aficionado cry, but does work for me in a pinch.

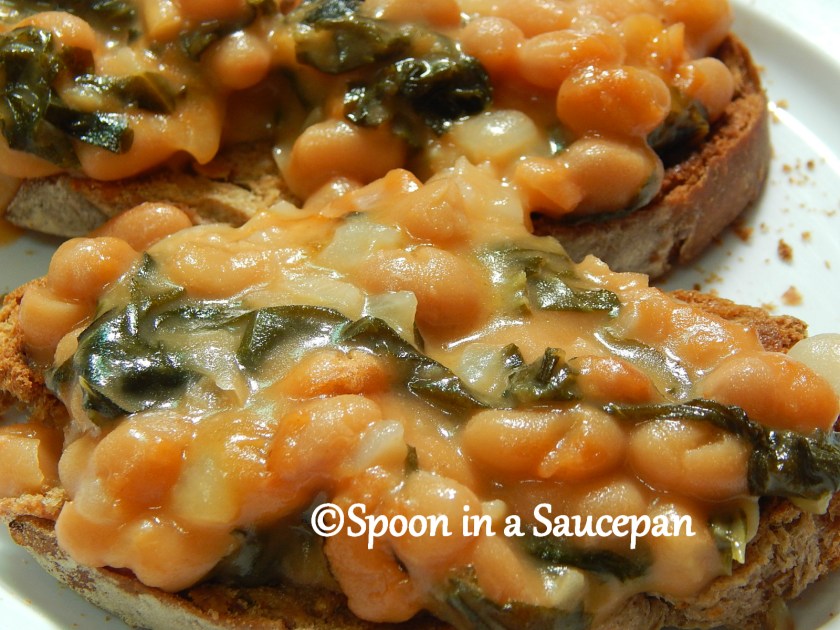
While yes, I love just plain baked beans on toast, I have become accustomed in recent years to fancying those simple beans up so that my easy meal is a little healthier and/or a little tastier without very much more work.  To that end, I give you the first way I started jazzing up beans here in Korea. The reason I started making these was that, one day, I had a bunch of kale leftover from making colcannon and I didn’t want it go to waste. I love these beans and gladly eat them on toast quite frequently.

Cheesy Kale Baked Beans on Toast

Serves 2*

Ingredients

  • 1.5 cup kale, chopped
  • 1 tablespoon butter(you can always add more if needed)
  • 2 tbsp, olive oil
  • 1 onion, finely diced
  • 1 tin of baked beans*
  • 2 tsp, sugar
  • 1 generous splash soy sauce.
  • Slices of cheddar cheese – enough to “top” the beans when putting in the oven
  • Your favourite bread, toasted.

Method

  1. Preheat the oven to 190ºC
  2. Meanwhile, boil a pot of water then add the chopped kale.
  3. Bring back to a boil, reduce and simmer for 10 minutes.
  4. Drain and squeeze out excess water.
  5. In the same pot, melt the butter, and then add the kale, sauteing for around 5 minutes. Remove from the hob/stovetop until needed.
  6. At the same time, heat an oven safe pot on medium heat.
  7. Once hot, add the oil and heat for a further 20 seconds.
  8. Add the onion and saute for 5-10 minutes.
  9. Once translucent and soft,  stir in the beans, sugar and soy sauce.
  10. Bring to a boil and then add the kale.
  11. Bring back to the boil, stirring frequently as you don’t want to burn the beans.
  12. Remove from hob.
  13. Add slices of cheddar cheese to the top of the beans.
  14. Transfer to the oven and cook for 10 minutes at 190ºC.
  15. Reduce the heat to 150ºC and cook for a further 15 minutes until the cheese is toasted.
  16. Meanwhile, slice your bread and place in the toaster or under the grill/broiler.
  17. Once toasted, butter (generously, is best) and top with the beans.
  18. Enjoy.

*I do not use pork and beans baked beans as they have a different flavour due to the pork being added, so I can not confirm to you if this recipe would work with them.  I prefer to use vegetarian baked beans. To readers in Ireland, Batchelor’s or Heinz are perfect. To readers elsewhere, I use Sun-Q Baked Beans in Korea.

**For this recipe to be lactose free, obviously don’t use the cheese or else substitute a vegan cheese. You may also want to skip the oven part.

Tips

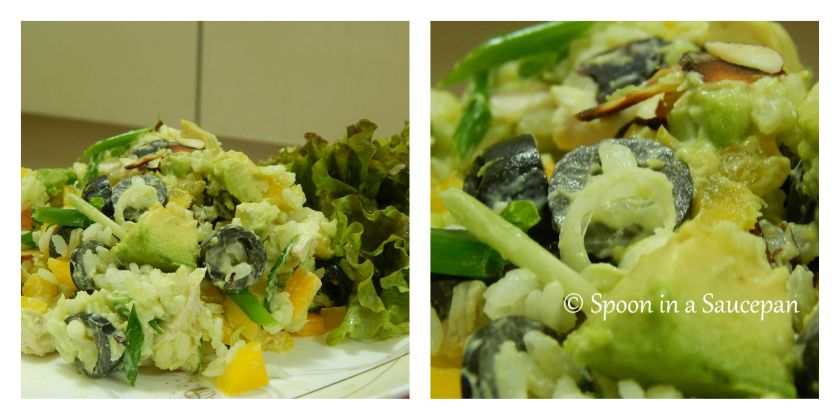
Make it for a larger crowd: If you leave out the toast you can also eat these beans as a side when serving Chicken Rice Salad as a main dish. Alternatively, serve it as a side to Shepherd’s Pie or the Roasted Pork Chops with Sweet Potato.

For breakfast the next day: Serve with sausages, eggs, rashers/bacon and fried tomatoes.

Make it your own: If you want,you can skip step 12-13, I find however, the “toasted” beans are really good. You could also swap the cheddar for mozzarella or Edam cheese. Can’t eat gluten? Use as filling for baked potatoes.

Chicken Rice Salad

He that sups upon salad, goes not to bed fasting

-Thomas Fuller

While I love winter and winter eats like hearty soups to rich curries, there is something about spring and summer that makes my heart sing. Spring also tends to alter my desire for making Shepherd’s Pie into cravings of salads, avocados and black olives. Consequently, I made a Chicken Rice Salad this week which spanned those three criteria.

Truth be told, years ago, when I was on holiday in Nebraska visiting my mother’s family, one of my aunts made a Chicken Orzo Salad. That salad had black olives and scallions and was dressed in garlic mayonnaise. I don’t have the recipe, nor do I know what cookbook it is from, but the below recipe is inspired by my memory of that tasty dish. Light and fresh, it pairs well with my Kale Baked Beans (coming soon).

Chicken Rice Salad

Serves 6-8

Ingredients

  • 2 cups uncooked rice, washed and rinsed
  • 4 pieces boneless skinless chicken breast, chopped into bite-size chunks
  • 1 yellow pepper, washed and diced
  • 15-20 scallions/spring onions, peeled, washed and sliced diagonally.
  • 30-40 black olives, sliced in thirds
  • 2 slightly firm avocados, diced
  • 1 cup pineapple* chunks (optional)
  • ½ cup sliced Almonds, toasted
  • 1 cup mayonnaise**
  • ½ tsp garlic salt
  • 4 cloves garlic, crushed
  • dash lemon juice
  • salt

Method:

  1. Cook the rice in a rice cooker or on the stove as per packet directions.
  2. Remove rice from pot/rice cooker and allow to cool in a bowl.
  3. Once cool, add the pepper, scallion and olives to the rice.
  4. Meanwhile, place the chicken in a pot with enough water to cover and place on the stove at medium-high heat.
  5. Bring to the boil, reduce and simmer for around 15 minutes. You want the chicken to be cooked through but not rubbery.
  6. Drain the chicken and allow to cool before adding it to the rice and vegetables.
  7. Toast the almonds: Pre-heat the grill/broiler on a low heat (around 100°C), spread the almonds evenly on foil and toast for 10 minutes, stirring occasionally.
  8. Salt gently and then allow the almonds to cool. You can then add them to the salad.
  9. Mix the mayonnaise, garlic and garlic salt together. If needed, add more garlic salt or mayonnaise, as per your personal taste.
  10. Mix the salad thoroughly and then stir in the dressing. Refrigerate until ready to serve.
  11. Just before serving, add the pineapple and avocado to the salad. Mix gently.

*For best results put the pineapple in the fridge overnight. Also, you can use fresh or tinned pineapple. I prefer to use fresh pineapple. If using tinned pineapple, drain before adding to the salad and only use pineapple in juice. **If you don’t like mayonnaise, or can’t eat it, I’d suggest using green pesto or an avocado dressing instead. If serving to several friends and you aren’t sure if they like mayonnaise, don’t mix the mayonnaise in but allow everyone to spoon some on their salad instead.

Tips:

Make it for a smaller crowd: This recipe is easily halved, when making for myself or a smaller number of friends.

For lunch the next day: If you are preparing this for a lunch the night before, add the mayonnaise, pineapple and avocado in the morning before you leave for work.

Make wraps: Try wrapping this mix in lettuce leaves or tortillas for a change.

Make it your own: Add more or less of any vegetables as per personal taste. Add more garlic or mayonnaise as needed too.

Courgette and Aubergine Stuffed Mushrooms

Nature alone is antique, and the oldest art a mushroom

– Thomas Carlyle

Growing up, everyone in my family always ate the exact same thing for dinner, whether it was shepherd’s pie or lasagna. The only exception to this was mushrooms. I’ve two sisters who absolutely detest them. As a result, my mother would end up making two pizzas or two stuffings. Over the years, I’d gotten used to having a few less mushrooms in my life than I would like; however, once I moved away from home and started cooking for myself, I’d find myself adding mushrooms to salads, sandwiches, scrambled eggs, etc. You name it, I probably added mushrooms to it. So it may surprise you to learn that I’ve never before made stuffed mushrooms.

Well, I had a ton of mushrooms recently and I was trying to figure out what to make with them. A little bit of research later (here, and  here), and I knew the basics of making stuffed mushrooms. Since then, I’ve been experimenting and I’ve come up with some lovely choices. This recipe is the first one that I will share with you as  I am still refining the rest. When I made these originally, I had tons of courgette and eggplant as well as a giant block of mozzarella cheese from Costco that was just begging to be utilised. However, you can easily make these into a lactose-free version. In fact, that’s what I did the second time I made them.

Confession: Each time I’ve made these, I’ve eaten them and nothing else for my dinner, and while this is certainly an option, I would recommend this recipe to be used as a side dish or appetizer in a larger group setting.

Courgette and Aubergine Stuffed Mushrooms

Serves 5-10

Ingredients

  • 1 aubergine/eggplant, small
  • 1 onion, medium
  • ⅓ courgette/zucchini
  • ¼ tsp, basil, dried
  • ¼ tsp, parsley, dried
  • Pinch of chili flakes
  • 1 garlic clove, crushed
  • 25 mushrooms
  • mozzarella cheese*
  • 3 tbsp grapeseed oil

Method

Preheat the oven to 200°C**

  1. Finely dice the aubergine, onion, and courgette.
  2. Place in a bowl with the chili flakes, parsley, and basil. Toss together until coated.
  3. Meanwhile, heat a large frying pan or wok. Once hot, add 2 tbsp of oil, and heat for 15-30 seconds.
  4. Add the vegetables and coat in the oil.
  5. Stir fry for 5-10 minutes until the courgette is softening.
  6. Add the garlic, and stir fry until everything is hot and cooked through. You want the mixture to be slightly browned.
  7. Meanwhile, line a baking sheet with parchment paper.
  8. Remove the stems from the mushrooms and discard.
  9. Dampen a paper towel, and wipe each mushroom cap. Toss the mushrooms in the remaining oil and then place on the baking sheet, top down.
  10. If using, add some finely diced mozzarella to the inside of each cap.
  11. Using a teaspoon, fill each mushroom cap with the aubergine and courgette mixture.
  12. If using mozzarella, top  each filled mushroom with a little more cheese.
  13. Place in the oven for 15- 20 minutes until the cheese has melted and browned.
  14. Serve immediately

Tips

*You can easily leave out the mozzarella cheese for a lactose-free version.

** If using a toaster oven, don’t preheat.

Ssambap with Sesame Noodles

One of my favourite things about living in Korea is the amazing food I’ve been exposed to on a very frequent basis from bibimbap to dakgalbi to Korean bbq. If you ever get the chance to eat Korean food, I hope you get to experience it the way I did, right here in good ol’ Korea. When I first arrived, I ate out a lot more often than I do now. I usually reserved cooking for the weekends when I was home or an odd midweek meal.

One reason I ate out so much was that I could not get enough of the grilled meats. In many restaurants here, at each individual table, there is a gas or electric ring where you cook your own meat and vegetables. I can remember vividly placing each piece of mouth-watering pork, beef or chicken hot from the grill onto a piece of crunchy green lettuce. Using my chopsticks in my right hand, I top the meat with kimchi, raw or grilled garlic, ssamjang, onions, and whatever other vegetables I can find at my table. After closing the lettuce over this tempting concoction, I shove it in my mouth, savouring the different tastes. This method of wrapping meat, rice and sides in lettuce is called ssambap which, loosely translated, means wrapped rice.

A couple of years ago, not long after I first arrived, one of my cousins visited me from America. My very kind co-teacher invited us both to dinner. The spread was spectacular and very reminiscent of the restaurants I’ve described above, with all the side dishes, and wrappings. My cousin is vegetarian, so we were mostly presented with vegetables, but there was some seafood, raw salmon and bulgogi for the rest of us meat eaters. We wrapped our food in rice paper, lettuce and thin radish slices. It was heavenly. On my cousin’s last night, I hosted a goodbye dinner for her and also celebrated a friend’s birthday. Amongst the various sides we ate, one dish was prepared by my cousin that was reminiscent of the amazing meal at my co-teachers earlier that week. We had mushrooms, tomatoes, cucumber and peppers wrapped in lettuce. Instead of rice we used sesame noodles.

This method of eating ramen noodles has become an easy go-to meal for whenever I have a busy evening or am just too tired to peel potatoes. After all, here in Korea, there is a convenience shop on every corner which carry multitudes of flavours, shapes, and sizes of ramen.  The recipe for sesame noodles is simplicity itself, but, to be honest, the noodles are just the tip of the iceberg. It’s how you use them that makes it fun. From eating them by themselves or adding them to salad, the choices are unlimited.

If you happen to have poor skills with chopsticks (like I did), try to get plenty of practice in while eating the sesame noodles. You can either serve this meal as a main dish for yourself, share with a friend, or split it between a few friends as a side dish to accompany Tuna and Kimchi Fried Rice or Stir-fried Lentils and Vegetables.

Ssambap with sesame noodles

Serves 2-4

Ingredients

  • Lettuce leaves, washed* – 10 per person
  • 1 package of ramen noodles, dry
  • Boiling water, enough to cover noodles
  • ½ – 1 tbsp of sesame oil, depending on personal taste
  • 2 tbsp grapeseed oil
  • ⅓ large courgette/zucchini, chopped
  • 1 small aubergine/eggplant, chopped
  • 1 onion, chopped
  • 1 carrot, chopped
  • ¼ tsp chili flakes
  • 2 garlic cloves, sliced
  • 1 tbsp soy sauce
  • dash of sesame oil
  • dash of fish sauce (optional)

Method

  1. Heat a pan or wok on medium-high heat for 30 seconds or until hot.
  2. Add grapeseed oil, and heat for 15-30 seconds. Don’t let it smoke.
  3. Add the courgette, eggplant, onion, carrot, sesame seeds, and chili flakes.
  4. Stir fry until the onion is slightly brown  and the carrot is softening.
  5. Add the garlic and stir fry for 1-2 more minutes.
  6. Stir in the soy sauce,  the dash of sesame oil and fish sauce and stir-fry until the soy sauce mixture had boiled off a little . Cook until everything is soft and lightly browned, around 5-7 minutes.
  7. Meanwhile, break the noodles and put them in a bowl.
  8. Add boiling water to the noodles to cover. Place a plate or lid on the bowl, and leave to stand to the side.
  9. Once cooked, which takes around 5 minutes, drain and add the sesame oil.
  10. Swirl the noodles in the oil, and if needed add some more oil. You want the noodles to be coated in oil, but not drowning in it. You also want the “sesame” taste.
  11. Leave to cool**.
  12. When the vegetables are cooked, place on a platter side by side with the lettuce and noodles.

How to eat: Place a piece of lettuce in your hand, top with noodles and some vegetables. Fold the lettuce around it, and eat it. Don’t put too much on, you want to try and eat everything in one bite. Repeat until you are full.

Tips

*Use your favourite lettuce or perilla leaves. If using as a main dish follow the rule above of around 10 leaves per person. If using as a side dish I usually get somewhere between 20-30 leaves, even for larger groups of around 10.

**I usually do the noodles just after step 3. I then drain them and add the oil. By the time the rest of the meal is cooked they will be slightly cooler. If you want, you can even make them the night before. I have done this on several occasions when using them for larger groups or in salads.


Dinners at Maggie’s: Egyptian Rice and Lentils

“Food is our common ground, a universal experience.”

– James Beard

A couple of years ago, we had a big family get together. Ostensibly, it was a celebration for my mom’s birthday but in reality we were celebrating a time of change and celebration. My mother and two of my sisters had birthdays that needed recognition. As it was the beginning of the summer, it was a last opportunity for everyone to enjoy each other’s company. We bid adieu to my brother as he left for a year of travel and work in Italy and Korea. Another sister, plus her family, was moving to Minnesota for 6 months as her husband was going to work at the Mayo Clinic. And the youngest member of our family was going too. Taking the opportunity to work in Minnesota for the summer and help our sister with the move. It was a fun but emotional day as everyone chopped, sliced, diced and came together. While we ate many incredibly dishes, most of which were from Extending the Table by Joetta Handrich Schlabach, one dish clearly stood out as the winner: Egyptian Rice and Lentils or Koshary/Kusherie. This has become a firm favourite for my family, and I consider it one of my “signature” dishes to cook whenever I want to impress my friends. It’s easy, mouth-watering, flavourful, and filling. However, if you decide to make it just for yourself, remember to halve the recipe!

DSCN0964[1]

Koshary is essentially an Egyptian street food. It consists of rice, lentils and macaroni topped with tomato sauce and fried onions. It is inexpensive to make and has few ingredients but a surprisingly satisfying flavor. While the method of cooking the lentils and rice needs to be followed exactly, it is not difficult or overly complex. The simplicity of this dish both in method and presentation makes this a perfect dinner for those who don’t have the luxury of a four-ring hob or indeed an eighteen piece dinner service!

Last week, I’d some friends over for dinner where this was the centre piece/main dish of the meal. Some of my friends who were there had eaten this dish before. In fact, the first time I made it for them, everyone at the table was completely silent for more than ten minutes. One of my friends even claimed that he’d forgot he wasn’t alone. If that’s not a huge compliment for this dish, I don’t what is!  This time, while there wasn’t complete silence, every scrap of the koshary was gone by end of dinner. Further, it definitely got the stamp of approval from everyone as I was immediately requested to post about it on this blog. Now, I just hope that everyone who makes this dish, feels the same way!

3Menu

I made everything myself except for the Tempeh Crisps which I bought in a local Asia Mart.

The morning was spent shopping in Home Plus and the afternoon cleaning and cooking. I had meant to serve some avocado tortilla roll ups as a starter but I forgot about them until 5 minutes before my guests arrived. So, instead, we had a Veggie Cream Cheese Dip. I prepared the Koshary sauce first, followed by the Basic Sesame Noodles, Salata Batatis, Koshary Macaroni, the Koshary Rice and Lentils and, finally, the No-dressing Salad and Drumsticks.  I’m really lucky that my friends are really adaptable and laid back as, despite having the entire day off, I’d to push back dinner by 15 minutes – and even then  I wasn’t fully ready. But no one complained.

When I was ready, I served everything Korean style: basically everything arrives at around the same time and is placed on the table together, starters along with the main. My lovely guests provided cheer, funny faces, drinks, bread and dessert.

DSCN0953[1]  DSCN0954[1]

I just want to take the opportunity to thank my sister who introduced me to Koshary and helped edit this post for me. Thanks!


Egyptian Rice and Lentils or Koshary

Serves 8

DSCN0966[1]

Ingredients

Sauce

  •  ¾ cup tomato paste
  • 3½ cup tomato juice, tomato sauce, or pureed tomatoes*
  • 1 green pepper, chopped
  • 3 tpsp of celery leaves,** chopped
  • 3 garlic cloves, minced
  • 1 tbsp of sugar
  • 1¼ tsp of ground cumin
  • ¼ tsp of ground red pepper or crushed red chilies, to taste.

Rice

  •  1¼ cup lentils,*** washed and picked over
  • 1½ cup rice, washed and picked over
  • 1 tsp salt
  • 4 cups boiling water or stock
  • 2 tbsp oil
  • dash of pepper

Macaroni

  •  2 cups of macaroni, cooked in salted water as per package directions.
  • 3 tbsp of sauce (above)
  • 1 Tbsp oil

Onions

  • 3 onions, sliced
  • 4 garlic cloves, minced
  • 2 tbsp oil

Method

  1. Combine in a saucepan*, all the ingredients for the sauce. Stir.
  2. Bring to the boil, reduce heat, and simmer for 20-30 minutes
  3. Meanwhile, in a heavy saucepan with a cover, heat the 2 tbsp of oil over medium heat.
  4. Add the lentils and cook for 5 minutes, stirring frequently.
  5. Carefully add 3 cups of boiling water or stock, the salt and pepper.
  6. Cook, uncovered, for 10 minutes over medium heat.
  7. Stir in the rice and  remaining water or stock.
  8. Bring to a boil, reduce heat, cover and simmer for 25 minutes****
  9. Cook the macaroni, as per package directions, in salted water.
  10. Drain and mix with the oil and tomato sauce
  11. Heat the oil in a large frying pan
  12. Fry the onions and garlic over medium heat until brown, for around 10-15 minutes,
  13. Once cooked, pile the rice lentil mixture on a platter with the macaroni and spread the sauce all over  it.  Top  with the browned onions. If you like you may serve with some plain, natural yogurt.

Tips

While I do find it necessary to follow the directions for each section meticulously for the success of this meal, this recipe quite adaptable in other ways. For example, I always make the main mixture of rice, lentils and sauce.  However, this was my first time making the macaroni and I thought it was a lovely addition. Just remember, when serving gluten-free friends, it’s best to leave it off. I usually include the onions and garlic as well, but on this day I completely ran out of oil. I’ve no idea how it happened. I didn’t even have butter. So, sadly, we did without the onion-y goodness.Sometime, I will make the whole dish properly!

I have made this recipe just for myself but, when I do, I halve the lentils and rice. Don’t forget to also halve the water – I’ve forgotten that before and it was gloopy mess. I usually keep the sauce at the same amount and freeze what I don’t use.

*At home in Ireland, rather than use tomato sauce, I used crushed tomatoes. I find the tinned tomato sauce, here in Korea, is too thick and has exploded over my kitchen more than once! Therefore, when I make this in Korea, I use one tin of chopped tomatoes and the rest is tomato sauce.

**I  don’t always add the celery leaves.

*Always use whole lentils – again, this time I used green lentils, but I’ve used whole red and brown ones before too.

***As I’ve only one ring, I made the sauce in my slow cooker. Put everything in the slower cooker pot, stir and cook on low for 4-5 hours. If you want to make this and only have one ring and no slow cooker, make the sauce first, then the lentil mixture.  When the sauce is cooked, keep a lid tightly on it to keep it warm. If needed, reheat just before serving. If you want to include the macaroni, make that before the rice and lentils. Prepare your platter with the rice, macaroni and sauce whilst frying your onions.

**** I’ve noticed that sometimes on the electric stovetop, the rice and lentils will cook for between 20-25 minutes. So I usually check at 20 minutes.